Automating Financial Workflows with QuickBooks API and Third-Party Tools

Richard Thornwell
23 June 2026
Automating Financial Workflows with QuickBooks API and Third-Party Tools
Manual data entry is the silent productivity killer lurking in your accounting department. Every hour spent copying invoice numbers, reconciling expenses, or generating reports by hand is an hour stolen from strategic decision-making. According to a study by the Institute of Finance and Management, finance teams spend up to 60% of their time on manual, repetitive tasks that could be automated.
If your business relies on QuickBooks for accounting, you’re sitting on a powerful automation engine that most companies barely tap into. The QuickBooks API — combined with third-party integration platforms like Zapier, Make (formerly Integromat), and custom middleware — can transform your financial workflows from tedious manual processes into seamless, automated pipelines.
In this comprehensive guide, we’ll walk you through everything you need to know about automating your financial workflows using the QuickBooks API and the best tools available today.
Why Automate Financial Workflows?
Before diving into the technical details, let’s establish why automation matters for your financial operations.
The True Cost of Manual Processes
- Human error: Manual data entry has an average error rate of 1-4%. In financial contexts, even a single misplaced decimal can cascade into costly mistakes.
- Time drain: A mid-sized business processes hundreds of invoices monthly. At 5-10 minutes per invoice, that’s 40+ hours of labor each month on invoicing alone.
- Delayed insights: When reports are compiled manually, decision-makers receive outdated information, making it impossible to respond to financial trends in real time.
- Employee burnout: Repetitive tasks lead to disengagement. Your finance team was hired for their expertise, not their data entry speed.
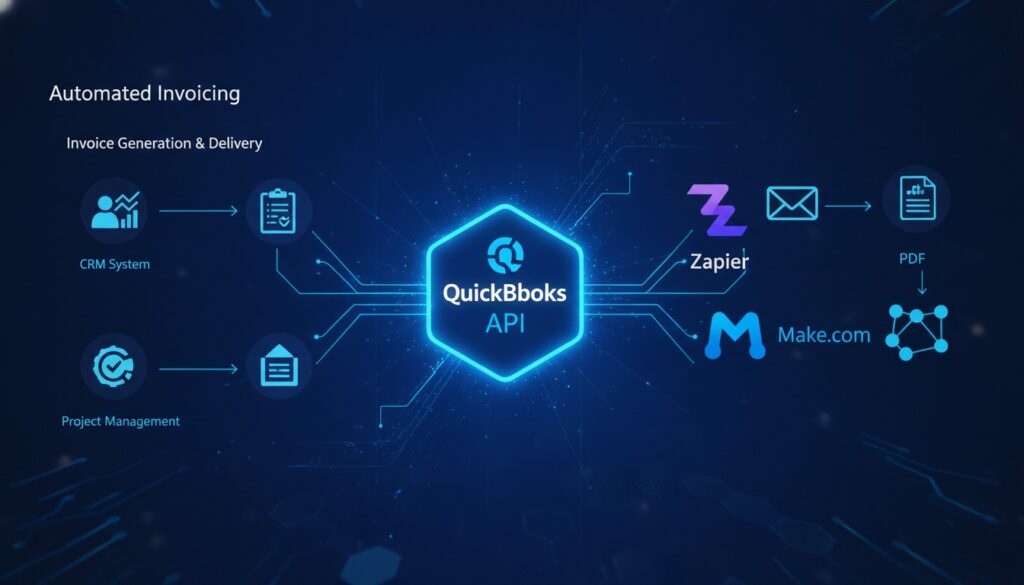
- Invoice creation and delivery — Automatically generate and send invoices when a sale is completed or a project milestone is reached.
- Expense tracking and categorization — Capture receipts, categorize expenses, and sync them to QuickBooks without manual input.
- Payment reconciliation — Match incoming payments to outstanding invoices automatically.
- Financial reporting — Generate profit & loss statements, cash flow reports, and custom dashboards on a schedule.
- Customer and vendor management — Sync contact information across your CRM, e-commerce platform, and QuickBooks.
- Tax preparation — Automatically categorize transactions for tax compliance and export-ready reports.
- Create an Intuit Developer account at [developer.intuit.com](https://developer.intuit.com)
- Register your application to obtain your `Client ID` and `Client Secret`
- Set up OAuth 2.0 authentication — QuickBooks uses OAuth 2.0 for secure authorization
- Choose your sandbox or production environment — Always test in the sandbox first
- Stripe → QuickBooks: Automatically create sales receipts or invoices when a Stripe payment is received.
- Shopify → QuickBooks: Sync orders, customers, and products between your e-commerce store and QuickBooks.
- Google Sheets → QuickBooks: Create invoices or expenses from spreadsheet rows — perfect for batch processing.
- Slack → QuickBooks: Get notified in Slack when a payment is received or an invoice becomes overdue.
- HubSpot → QuickBooks: Create QuickBooks customers automatically when deals close in your CRM.
- Choose your trigger app and event (e.g., “New Payment in Stripe”)
- Connect your Stripe account and configure the trigger
- Choose QuickBooks Online as your action app
- Select the action (e.g., “Create Sales Receipt”)
- Map the fields — Match Stripe data to QuickBooks fields
- Test and activate your Zap
- Complex scenarios: Make supports conditional logic (routers), iterators, and aggregators for multi-step workflows.
- Better pricing for high volume: Make’s pricing is based on operations, often making it more cost-effective for data-heavy workflows.
- Data manipulation: Built-in functions for parsing, transforming, and formatting data before it reaches QuickBooks.
- Error handling: More granular error handling with retry logic and fallback paths.
- An employee photographs a receipt using a mobile app
- The image is uploaded to Google Drive
- Make detects the new file and sends it to an OCR service (like Mindee or Veryfi)
- The OCR extracts vendor name, amount, date, and category
- Make creates an expense entry in QuickBooks with the extracted data
- A confirmation is sent to the employee via email or Slack
- You need to process thousands of transactions daily
- Your workflow requires complex business logic or calculations
- You need real-time synchronization between multiple systems
- Data security requirements demand on-premise or private cloud hosting
- You need audit trails and compliance logging beyond what no-code tools offer
- Use a message queue between your systems and QuickBooks to handle rate limits (QuickBooks allows 500 requests per minute per company).
- Implement idempotency — Ensure that retrying a failed operation doesn’t create duplicate records.
- Log everything — Maintain detailed logs of every API call for debugging and audit purposes.
- Build a reconciliation layer — Periodically compare records between your systems and QuickBooks to catch any sync failures.
Key Insight: Businesses that automate their financial workflows report an average 30-50% reduction in processing costs and a 75% decrease in data entry errors, according to research from McKinsey & Company.
What Can Be Automated?
The scope of automation with QuickBooks is broader than most people realize:
Understanding the QuickBooks API
The QuickBooks Online API (also known as the Intuit Developer API) is a RESTful API that allows external applications to read and write data to your QuickBooks Online account. It’s the backbone of any serious automation strategy.
Key API Capabilities
The QuickBooks API provides endpoints for virtually every entity in your accounting system:
| Entity | Operations | Use Case |
|——–|———–|———-|
| Invoices | Create, Read, Update, Delete | Automated billing |
| Payments | Create, Read | Payment recording |
| Expenses | Create, Read, Update | Expense management |
| Customers | Create, Read, Update | CRM sync |
| Vendors | Create, Read, Update | Supplier management |
| Reports | Read | Automated reporting |
| Items | Create, Read, Update | Inventory sync |
Getting Started with the API
To begin using the QuickBooks API, you’ll need to:
“`python
import requests
url = “https://quickbooks.api.intuit.com/v3/company/{companyId}/invoice”
headers = {
“Authorization”: “Bearer YOURACCESSTOKEN”,
“Content-Type”: “application/json”,
“Accept”: “application/json”
}
invoicedata = {
“Line”: [{
“Amount”: 150.00,
“DetailType”: “SalesItemLineDetail”,
“SalesItemLineDetail”: {
“ItemRef”: {“value”: “1”, “name”: “Consulting Services”}
}
}],
“CustomerRef”: {“value”: “1”}
}
response = requests.post(url, json=invoicedata, headers=headers)
print(response.json())
“`
Pro Tip: Always implement proper error handling and token refresh logic. QuickBooks access tokens expire after one hour, and refresh tokens expire after 100 days. Build your token management into your application from day one.
Automation with No-Code Platforms: Zapier and Make
Not every business has a development team ready to build custom API integrations. That’s where no-code and low-code platforms shine. They provide a visual interface for connecting QuickBooks to hundreds of other applications without writing a single line of code.
Zapier: The Simplest Path to Automation
Zapier connects QuickBooks Online to over 6,000 apps through simple “Zaps” — automated workflows triggered by specific events.
#### Popular QuickBooks Zaps
Make (Formerly Integromat): Advanced Visual Automation
Make offers more sophisticated automation capabilities than Zapier, with a visual workflow builder that supports complex logic, branching, and data transformation.
#### Why Choose Make Over Zapier?
Imagine this workflow:
Building Custom Middleware Solutions
For businesses with complex requirements that exceed what no-code platforms can handle, custom middleware provides the ultimate flexibility.
When to Build Custom
Consider custom middleware when:
Technology Stack Recommendations
| Component | Recommended Tools |
|———–|——————|
| Backend Language | Node.js, Python, or C# |
| Queue System | RabbitMQ, AWS SQS, or Redis |
| Database | PostgreSQL for transaction logs |
| Hosting | AWS Lambda (serverless), Docker containers |
| Monitoring | Datadog, New Relic, or custom dashboards |
Architecture Best Practices
async function createInvoiceWithRetry(invoiceData, maxRetries = 3) {
for (let attempt = 1; attempt <= maxRetries; attempt++) {
try {
const response = await axios.post(
`https://quickbooks.api.intuit.com/v3/company/${companyId}/invoice`,
invoiceData,
{ headers: { Authorization: `Bearer ${accessToken}` } }
);
return response.data;
} catch (error) {
if (attempt === maxRetries) throw error;
await new Promise(resolve => setTimeout(resolve, 1000 * attempt));
}
}
}